Menu
Phone
Posted: Tuesday, October 13, 2020
While having a radiator is one thing, you need radiator valves for it to work efficiently and reduce heating bills.
If you’re buying a radiator and valves for the first time or replacing your old valves with Thermostatic Radiator Valves, you need to know how to fit them. There are lots of questions and topics to answer but let’s start with the main one - how do you fit a radiator valve?
Trads is here to explain everything about radiator valves and the installation process, the types of valves and what they do…
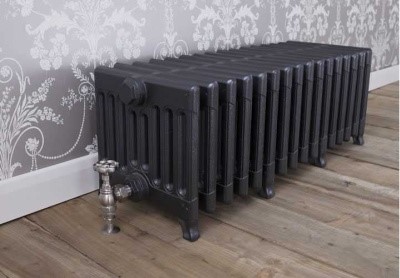
Radiator valves are what you see at the bottom of a radiator. They allow you to control how much heat you want your radiator to give out, just like a tap to control water flow.
Each radiator will have two valves. One will control the amount of hot water that enters the radiator and the other will balance the system by controlling how much heat comes out of your radiator. This is known as the ‘lockshield valve’.
The lockshield valve is often covered with a plastic cap and controls how much water flows out of your radiator and back into the pipework or stays inside your radiator. The lockshield valve is usually fixed to prevent you from turning it. It is used to balance your radiators.
There are two main types of radiator valves to choose from, thermostatic and manual radiator valves
The most common type of radiator valve is a manual valve. The clue to how manual valves work is in the name. You have to turn them to regulate the temperature in a room.
They work just like a tap, by altering the flow of hot water from the boiler into the radiator. The higher the setting, the higher the volume of hot water entering the radiator to produce greater heat. Once a room has reached a temperature you want, you will need to turn the valve down to a cooler setting yourself.
Manual valves are simple to use and are generally smaller in size than thermostatic valves. As they are manual, you have to ensure that you remember to manually turn them off yourself when you don’t need them on. Otherwise, you will be wasting unnecessary energy and money on heat that you don’t need.
Thermostatic radiator valves (TRVs) give you much more control over the temperature in your home as they have more advanced features than a standard manual valve. However, just like a manual radiator valve, you can personally set the valve to what temperature you’d like a room to be.
The Thermostatic ‘senses’ the temperature in your room and once the temperature you have selected is reached, the valve will automatically stop hot water flowing to your radiator and prevent it from getting any hotter.
This enables the radiator to manage itself for the majority of the time. Therefore, you don’t need to worry about having to turn the valve off yourself. This means that a TRV will do it for you, saving you from wasting unnecessary heat and money - benefitting your heating bills and the environment.
While looking for radiators, you may have heard of two valves. Most radiators have an opposite end connection, meaning they come out either side of the radiator at a horizontal angle.
Angled radiator valves, true to their name, always connect the radiator to your central heating at an angle, usually at 90 degrees. They are used when the pipework comes out of the wall or from below the floorboards. These are becoming more popular as they look neater with less visible pipework than a straight valve.
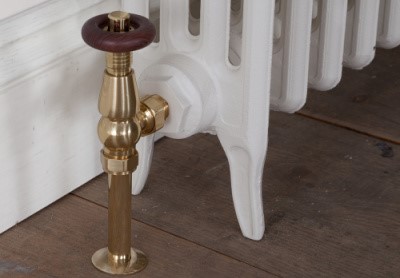
Straight radiator valves have no bends or curves and connect your central heating with the radiator straight up from the floor. This means that your water will flow up from the floor or along your wall into your radiator, giving a sleek straight-line appearance. if your pipework runs along the wall, a straight valve is the most appropriate choice.
There are many reasons why you may want to replace a radiator valve, out of design choice or through fault.
You may need to replace a radiator valve because it has stopped working, replacing a manual valve with a thermostatic radiator valve, your old valves look a bit outdated and need updating or they’re leaking.
As with any type of plumbing job, you should have some knowledge or experience already before attempting this. If you aren’t confident in your abilities, it’s best to get a professional.
For this guide, we’ll guide you through the process of removing an old valve and fitting a new one. The equipment you’ll need includes:
Before changing the radiator valve, you need to isolate the water supply. When you shut the water off, it won’t enter the boiler which could cause it to overheat and burn out the pumps. So, you need to switch off the heating system, too. You should make sure:
Find the drain off nearest the radiator that you are working on. It is often found at the lowest point in the house. You need to make sure that it is below the radiator. You’ll need a hose which will connect to the drain off and then you’ll want the other end of the hose outside.
Ideally, run it outside or to a suitable drain where the water can run off. Put a towel or cloth under the drain off to catch any drips and leaks. Open the drain cock and then once it’s empty, you can change the radiator valve. Undo the drain off using an adjustable spanner or grips.
Next, open the air valve or bleed key. You’ll be able to hear air entering the radiator which means that the radiator is emptying of water. Having air in will prevent water being trapped which could be released while you’re working.
Now that the system is completely drained, you can remove the radiator valve. Using grips or an adjustable spanner, undo the top nut on the radiator valve and then undo the bottom nut. This will allow you to take the valve off completely.
Put a towel under the valve that you are working on to catch any water which will drip as you undo the valve. This will prevent the floor from getting wet with water which can be dirty.
Use a hex key - a hexagonal radiator spanner - or a plumber’s wrench to remove the chrome tail which connects the valve to the radiator. It may be hard to turn, so grab your adjustable spanner or grips to help create some leverage.
There might be some water that spills out from the pipe or radiator, but your towel should catch this. If there is a lot of water, put the valve back on the pipe and allow it to just empty into a container. Before replacing the valve, clean the area around the radiator.
Fit the new chrome radiator tail where the old one was removed. Remember to use PTFE tape to minimise the risk of a leak. Locate your water pipe and then slide the nut and then attach the olive onto it.
Take your new valve body and connect it to the water pipe while lining it up and inserting it into the radiator tail. Be patient because this can be quite tricky. Once the valve body is in place, tighten the nut on the tail and then the bottom of the water pipe but not too much.
Once you’ve done that, remove the protective cap from the top of the valve body by unscrewing it. Take the top of the valve, connect it to the valve body and then gently tighten up the nut. Try using some cloth when tightening nuts so the valve isn't damaged.
Once you have tightened everything up, it’s time to turn everything back on. Close all the radiator valves you’ve opened, including the bleed valve.
Turn the water supply back on and refill the heating system. Keep an eye on the new joints for any leaks. Once you’re happy with that, you can open the new radiator valve up so that the water can flow into the radiator. If there are no leaks, then everything should be fine.
Finally, if the valve isn’t leaking, open up the bleed valve to let out any air that may be trapped inside the radiator. Air will prevent the water from filling the radiator and mean your radiator won’t warm up properly.
Learn how to bleed a radiator with our dedicated blog post.
Connect the power back to your boiler to get running again. After an hour of the heating being on, check the radiator to ensure everything is working.
Is it time you updated your radiators? Here at Trads, we have an excellent range of beautiful cast iron and steel radiators to update your home with!
Feel free to contact us if you need any help choosing a radiator
< Back To Blog