Menu
Phone
Posted: Friday, June 19, 2020
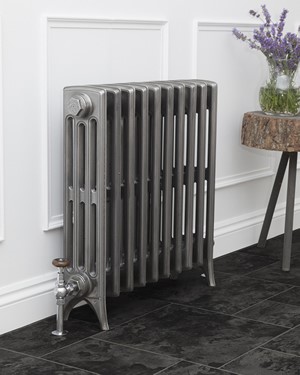 If you’ve spotted one of our stunning radiators, you might be wondering just how easy it is to replace one of your old ones with a nice shiny new one.
So, to help you out, we’ve put together a complete guide to changing radiators, allowing you to decide whether you are able to tackle the job yourself - or if you’d rather sit back and get a plumber in!
Difficulty: Medium
Changing your radiators is a pretty straight-forward job that can be done in just a couple of hours if you know what you are doing. The easiest way to do it is to replace your radiator like-for-like; meaning finding one that is the exact same size as your old one.
In this scenario, it will take some elbow grease and a little skill, but should be possible to do yourself if you feel you are competent at most DIY tasks.
Be cautioned though, if the job goes wrong you could end up with some messy water damage to your carpets and wallpaper!
For those who aren’t comfortable with changing their radiator themselves - even if it is the exact same size - a plumber will be more than happy to do this job nice and quickly for you.
If you do want to change the size of your radiator, this will mean adjustments will have to be made to your pipework - so getting a plumber in is probably the best idea!
To replace a smaller radiator with a larger one - or vice versa - your floor boards will need to be lifted up to access the pipework below them. Once the new radiator is positioned, your pipework will be adjusted to fit the change in dimensions. You need to be sure someone who knows what they are doing carries out this job, as any mistakes can lead to very troublesome leaks.
So, if you have decided to change your radiator like-for-like yourself, you probably now want to know how to go about doing it...
First of all, you will want to be sure you measure for your replacement radiator properly. To do this, you need to use the ‘pipe centre’ number. This is the distance between the two valves at either end of the radiator, which will be attached to your pipework. Don’t simply measure along the top of your radiator, as this won’t give you an accurate reading of what size radiator you need.
You should also pay attention to depth. If you choose a radiator that sits further away or closer to the wall, you might also face issues with connecting it to the pipes.
As for measuring the radiator height, this shouldn’t really make a difference, so long as you are sure the wall can support the weight of it, and you won’t hit any obstacles when fitting it.
Before you start work on replacing your radiator, always check the condition of the wall, first. If your current radiator is hanging on to crumbling plaster, it’s best to patch it up at this point. You should also make sure that you know where wall studs, wiring or pipes are hiding in the wall, too. A digital detector can do this for you, which can stop you drilling into any hazards.
Make sure you have plenty of old towels or protective sheets ready to stop any water damage, too. You might be surprised at how much dirty water can come gushing out of the valves, so keep your carpets safe from stains.
Next, follow these steps to replace your radiator...
Getting off to an easy start, the first thing you need to do is turn off your central heating and water supply. Make sure the radiator has completely cooled down before you do anything else.
Then, you need to isolate your radiator by closing off the valves located at both ends. At one end, you will have your manual control valve or a thermostatic valve. Turn this clockwise until it stops.
At the other end will be your lockshield valve. Again, turn this clockwise with a spanner until it goes no further. Note down how many turns you made, as you will want to set it back to the same position when your replacement radiator is set up.
Next is to release all the water out of your radiator so you can remove it. You will find a connection at either end of your radiator - this one looks like a nut. Place a bowl and towel down underneath it, ready to catch the water.
Using a spanner, turn the nut away from you a little to loosen it. Use a second spanner to hold the pipe coming out of your floor in place to prevent any damage.
You won’t find a lot of water comes out straight away, as you now need to let some air in. You do this by placing your radiator key into the bleed valve at the top and turning it clockwise. You should then see more water begin dripping down into your bowl. If it fills up too quickly and you need to empty it, simply close the top valve to stop the water flow - or, keep two bowls handy.
Do this at both ends of your radiator.
Be patient while draining the water out. It might take a while, but it’s better to wait until it is done than risk dirty water spilling out onto your floor.
Once all the water has drained out, you can lift your radiator off the wall or off the floor. You might need to pull the pipes out slightly at the sides before lifting it straight upwards - a second pair of hands might help you here, as radiators can be very heavy.
There will likely be some dirty water still inside, so very carefully tilt the radiator valve into your bowl to pour out the last little bit. Then, stuff a rag into the opening to prevent anything leaking as you take it out of the room.
Remove the valve tails (the nuts) from your old radiator and clean them up, as you will be able to use these again. Apply some PTFE tape to their threads to keep the seal intact - about 5 - 10 rounds should be ok.
If your new radiator isn’t compatible with your old brackets, or it has different dimensions, you will need to take these off and fix your new brackets or fixtures on. If you have a freestanding cast iron radiator, you might just need to attach a new wall stay.
If you do need to replace a bracket, measure the distance between the fixtures on your new radiator. Then, measure from the bottom of the bracket to the bottom of the radiator. Plot onto the wall where the brackets will be positioned using a spirit level to be sure they are straight, before drilling into place.
When you hang the new radiator onto the brackets, be sure it’s bottom valves align with the pipes in your floor.
Once you have everything lined up, place your bleed valve and valve tails back into the new radiator. Hang it onto the bracket or position it on the floor, and tighten the nuts to connect the radiator to your pipework. Just like in step two, use two spanners; one to tighten the nut, and one to hold the pipe firmly in place while you do so.
Then, return to your lockshield and control valves that you isolated to drain the radiator. Reopen them by the same number of turns you made to close them. Finally, open the bleed valve a little to let any trapped air out, making sure to close it properly when done.
At this point, you’ll probably hear a lot of gurgling as the radiator fills itself with water. If you don’t, check that you have opened the valves enough.
Radiator corrosion inhibitor is incredibly important to your central heating system, as it stops troublesome sludge being produced as a result of water coming into contact with the metal.
When you drained your radiator, it is likely you lost some corrosion inhibitor, so it will need to be replaced - even if you didn’t flush the whole system out. There are a few different types available, so find the right one for your central heating system.
Once you are sure all connections are nice and tight, you can go ahead and turn on your central heating system and enjoy your lovely new radiators!